Well, I guess I’ve gotten vain enough to assume that I might know a thing or two about Avids and editing. So perhaps the world would be a better place if I shared my seemingly limitless knowledge (?). Occasional tips that relate to offline and online editing, Photoshop (my right hand), After Effects (my third hand) and managing media and other files. Throw in the occasional rant to let off some steam and you get the gist . Thanks for reading.

Wednesday, October 20, 2010

22- MICKEY ROONEY

And now the twenty-second commandment.

Those who know me may be surprised to learn of my religious background. Or maybe they wouldn’t be given how much I call out to God asking why he hates me when a drive fails or the Avid locks up. The church was a big part of my upbringing. Back then I was pretty involved. My favourite thing to do was stand behind a lectern (podium, for the non-secular among you) in a church full of people and read from “the good book”. I’d practice for a fair while before mass and then in my most passionate voice I would read aloud attempting to capture the power of the bible.

But I was always handicapped. Lay-people (those not ordained) could not leave the lectern. They had to stand behind it, in one place, never deviating. So our oratory skill was confined, literally, to one square foot of real estate.

Well, any good speaker will tell you that the biggest way to keep people engaged was to never, ever use a podium. You see if someone moves around a stage human nature forces you to engage that person. Like a fly in a white room your eyes are sucked in to the one thing that actually moves in front of them. It’s much harder for you to get tired of the narration.

Now back to our mutual editing planet. I’m a big fan of static scenes. I like them for two reasons: one, I get to control how long a shot gets to be – not a cameraman with A.D.D. who insists on panning and zooming every-single-shot (you hear that camera people! Knock it off!). And the second reason is that if framed properly the scene can exude a sense of visual poetry that compliments the subject and doesn’t detract from it. Translation, it doesn’t NEED to move.

That’s all great in a perfect world. In a perfect world every shot is stunning; every scene in balance. But I don’t live in a perfect world. I live with the footage I have and sometimes the footage I have doesn’t motivate. Sometimes you’re trying to use the footage in a way that requires energy but, alas, the shot doesn’t have energy. Sometimes the footage lacks focus. So what do you do? You break free of the podium, that’s what.

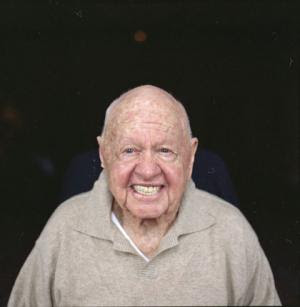
I apply keyframes at the head and tail of a clip and scale in or out -- just a little. In “the biz” (god, I hate that expression) we call this a ‘creep’. Or, if you want to be cruel, a ‘Mickey Rooney’ (a little creep). A little creep (no more that a few percent) is just enough to add a teeny, weeny, tiny bit of visual interest to a static shot. It can magically transform a scene which can hold the viewers interest for a couple of seconds (at most) to scene that can hold the viewers attention almost indefinitely. Be careful not to overdo it. Like salt in the sauce or crazy glue on the broken mug - just a lil’-dab’l-do ya.

But maybe you don’t want to do a creep. Maybe you really feel your shot shouldn’t move but still lacks focus. Well, if it’s in HD try re-cropping the scene. Why do I do this? It’s probably best explained in one of my more smart-ass moments when a respected director of photography asked me how he could treat the footage so the editor wouldn’t reframe it. Without hesitation I replied, ‘Frame it right in the first place”. I was very proud of myself for that instant reply. But in truth the cameraperson doesn’t always know what the shot will be used for. No reason for you to suffer. Blow it up, slide it up, down, or side-to-side until you get the framing you like (take care it doesn’t get too soft). Then, if they ask, lie and tell them that’s how they shot it and it’s your favourite shot. How can they question their own brilliance?


The word of Fish.

Friday, July 23, 2010

MECHANICS


021 - From time to time here on the program I like to address some reader mail that comes my way. Here’s one from Stephan. Stephan writes, “[Hey, Editing God]. What do you think of the Avid’s new smart tool?”

Well, first I’d like to say that it’s always great to get feedback (always better to get the positive kind). I love my fans especially you; the one reading this right now. Love you the most – I really, really mean it.

Smart tool, eh? Well Stephan, that’s a darn good question. However this is a TIPS and TRICKS blog so I don’t have to answer that one. Bye!

“What!” you say? You DEMAND an opinion?!? Well, it’s not like I have an opinion for everything, y’know. Wait a minute. In fact I DO! Okay…lemme try this one.

Avid’s new smart tool: on the surface it is a fundamental change to the long cherished way of handling media in the Avid timeline. It’s is always a dangerous thing to tamper with the universally understood mechanisms in any system (witness OSX changing command N to mean new-Window instead of new-Folder –wow, what anger Apple received over that one!). Despite this Avid bravely dove in and tried to fix a long-standing issue with dragging, trimming and rubberbanding. Namely the issue of too many freak’n mouse clicks to perform the operation.

Truth is I’m still getting used to it. And I will say that I find myself occasionally suppressing the need to punch something when the timeline is fighting my finger-memory. But I ask myself – what if it was this way from the very beginning? Would it still be annoying or would I have adapted to that and resisted any change to deviate? I have to admit it would be the latter. So I think the new smart tool is welcome addition.

Lest anyone think that I’d paid by Avid to kiss their royal behinds allow me to retort. The tool is very clever and well conceived. However, I think when implementing it they should have included an optional preference setting. There’s another example that comes to mind: Superbins. Personally I don’t like ‘em. And I have two huge/wide monitors with loads of real estate which I take up with multiple open bins on top of other open bins. So I don’t need Superbins. I don’t want Superbins. But if I had to edit on a laptop I think I’d gain a whole new appreciation for their existence. Avid wisely made them an OPTION. Like my clients I’m a big fan of options. So the Smart tool loses a star for not being an optional implementation (unless I missed a preference somewhere).

It also loses a ½ star for not allowing me to have settings I can quick-key. Imagine if I could hit shift-F4 and get the combination of the smart tool I want. Or being able to map that to a button. I’d really love to have that because right now I find myself CONSTANTLY turning the individual buttons on & off. Wasn’t the point to avoid that? Minus another ½ star for the fact that the Smart tool resets itself seemingly all the time. That annoys the crap out of me. And why does it have those icons? And why won’t they name an edit suite after me?!? And why don’t they make planes out of the same stuff that the black box is made out of!!! Wait, I think I lost track.

The overreaching point of today’s blog is --- a bunch of points. I do find issues with my Media Composer that I wish they would fix. I’m not a fan of any software to the point that I think its perfect the way it is. I like change. And I don’t use this platform to bitch about the Media Composer (much) but to hopefully share some of the things I’ve learned as an editor.

But I have been trying to think of a way that I could “suggest” a few alterations to the software and at the same time point a few fans of this blog toward an appropriate venue for my rants (of which this blog is not). So for next while, until I run out of rants, at the end of each blog I’ll include a link that points straight through the suggestions forum on the Avid site to latest suggestions for the Media Composer. I’d appreciate it if you’d weigh in and tell me if I’m right, wrong or (more than likely) misinformed. I figure the more voices the more likely the change…hopefully for the better.

Thank you Stephan and every other listener out there. Rock on. Fish-out.

_______________________________________________________________

Wish like a Fish: an explanation
http://community.avid.com/forums/p/86819/491933.aspx#491933


Wish like a Fish: Effects- Part 1
http://community.avid.com/forums/p/86820/491934.aspx#491934

Thursday, July 15, 2010

OPTICAL POETRY


020 - Recently I took a short trip and on the plane I carried along my favourite drug to get me through my semi-mild fear of flying – my iPhone. In “Airplane Mode” I use it to watch movies. I don’t know about you but I find watching movies teleports me to another world where I swear the plane could be on fire and on rapid decent and I’d be more excited about the car chase in front of me.

And what was on the bill today? A movie I had wanted to see for a while but was never quite in the mood for at the video store: Sideways. Paul Giamatti and Thomas Haden Church are a brilliant, fresh duo. I really loved the character study of these two. And Kevin Tent was phenomenal. I mean truly magnificent.

Who is Kevin Tent? (sigh) The editor of course! Duh!?! Kevin cut the movie. Or, to put it another way, Kevin dissolved the movie. Kevin and I think exactly along the same lines as to what dissolves are for.

Back in film school we were taught, “Dissolve: a transitionary device in film where two scenes blend, via opacity, from one to the next communicating to the viewer a change of time or place”. Well, like Robin Williams quoting a textbook definition of poetry in The Dead Poet’s Society I say to my film prof, “Excrement!”.

Yes, dissolves can be used that way. But frequently it’s due to a lack of imagination on the director’s part. In short, it fixes a time/place change problem that should have been solved in pre-production. When I was an assistant, I learned from my mentor, Andy, that dissolves are really a paintbrush. If carefully woven they are poetry in light leading the eye smoothly from one place to another while at the same time invoking a unique, emotional tone.

In Sideways Kevin almost always uses dissolves in artistically. There is the transition of Giamatti’s face to a beautiful sunset just when he’s happy for the first time in the movie. Or the dissolve between the actors walking away in close up to a wide shot with no passage of time at all. Or the multiple overlays of imagery while the fou
r characters enjoy wine and conversation at the dinner table. Look closely and you’ll see Kevin works very hard to ensure no face slams into another face, no recognizable form competes with another during the dissolve. Instead things, people, or places dissolve into a “pocket” or a non-cluttered area of the frame, smoothly leading the eye around the frame from point to point. Is time passing? Maybe. But that’s not what Kevin’s trying to do here. He’s carefully sewing the visuals together in a poetic dance.

Senior editors with premature gray, such as this blog writer, would refer to this last example from Sideways as “bi-packing”; the film optical term used to describe superimposing one image over another - often between dissolves. It’s an art form. If you want to see this in action for a few minutes solid watch the opening toy sequence in Rob Reiner’s often forgot film North. Toy trains dissolve seamlessly into hills, which pan over and dissolve perfectly with dolls. Cheers to you Robert Leighton.

That’s not to say things can’t be shaped into a director’s mind. There are some awesomely preconceived dissolves in Highlander along with a few funky but calculated wipes for good measure. In fact I find the measure of a good director is often when they don’t use dissolves. They know what I know - which is dissolves are not strictly speaking “needed”to craft the story.

And so with this, my 20th blog, I impart upon you the sage words of Andy, my mentor. “Fishy”, he’d say, “A good dissolve is a long dissolve.” Long, I learned was much more than two seconds. By making it long you’re forcing the brain to resolve one image going into the other – slowly. You’re trying to create poetry. And if it’s long and it’s not working you know you need to try something else.

Like maybe a cut.

Friday, July 9, 2010

LAYER CAKE

019 - I rarely leave my chair. Other than the occasional request to supervise a colour correction session or an audio mix there’s isn’t much call for me to actually use my legs. This can result, if left untreated, in a chronic case of “editor’s butt”. Trust me, it ain’t pretty. I really should get out more to see other people at work. Watching them work demonstrates individual methodology (the good and the bad) and provides insight into how I can improve my own day-to-day workflow. And isn’t that the underlying theme of my blogs?

On one occasion a spot I worked on was being re-composited at a 3D animation studio in (on?) a system I had never seen before. The interface was akin to tearing open an Avid timeline, letting the clips spill out, in a seemly in a random fashion, over a large gray table and having thin strings connect them together in some kind of order that escaped me. I thought it was a stupid interface.

But as I watched the animator work I noticed he always had access to my original media, his effected clips, and his trials and errors and his final composite -all in the same project and all in the same “space”. So when I went back to the shop I looked at my timeline in a very different way.

Let me back up for a moment. Have you ever worked on a Media 100 circa 1997 to 2001? If you have you know my pain. After working on an Avid for 5 years I was forced to use this system exclusively for four consecutive years (or was it decades, I can’t tell). Other than one single independent graphics layer it was strictly A-B roll editing. Some editors rock to this. But if you use an Avid (or Final Cut, or Premiere) I’m guessing you agree that while it is a very fast way to put together a cut it is a tragically inept way to keep up with the demands placed on post facilities. Adding layers upon layers of titles and graphics and tweak them with relative ease is a must today.

But there’s more to it than adding graphics . You might decide a single layer will only be your dialogue edit. The next layer only your b-roll. And more b-roll above that on the next. It can save a fair bit of trimming and sliding knowing your dialogue isn’t pushing or pulling everything else around the cut. It’s not appropriate for every project but when it is it is blindingly fast. So when we bought a brand new edit suite to work with in our brand new company, Avid it was (again). I swear to God I actually hugged the box the day I arrived.

But my experience with this animator and his system showed me that layers was offering me another amazing opportunity I never, ever considered- the ability to stack multiple versions of the same clips into the same timeline. Why on earth would I want to do this overly complicated thing? Well, since I frequently export material to be composited or colour corrected in After Effects, when it comes back it does so without any of the corresponding metadata that Avid needs to keep track of what it is and where it came from. And all the careful labeling in the world doesn’t allow me to see, in an instant, what I had done before.

So now, for my needs, the composited version of a clip is laid ON TOP of the original. And/or the colour corrected version of a clip is laid ON TOP of the original. When I hit Play all I see is the effected media but if I need to I can peek at the others. If I want to I can trim the original and export it for colour correction again. More importantly if I consolidate and backup this timeline the original rough-cut media and the final media are kept together. If a client needs changes I have everything I need to do them in one place. No messing with re-digitizing or re-importing. No sorting through older cuts to figure out what I did or backing up multiple timelines for safety.


Ten years ago this would have created a bloated media folder too large to handle, but today with cheap hard drive space a-plenty there’s really no reason not to. In short, I can have my cake and eat it too.

Friday, June 18, 2010

A ROSE BY ANY OTHER NAME


018 - I generally do my own work. By that I mean I don’t finish (online) other editor’s edits (offline). I made a conscious decision years ago not to focus on the finish but instead the process of telling the story. And so I learned to make damn sure that my projects were meticulously organized because, at the time, I had to hand them off to an online editor who was charged with assembling them. Since online was at ten times my rates for offline it was critical that my edit decision lists (EDLs) were as clear and easy to understand as possible. Eventually finishing/online was thrust upon me by a) a marketplace that could not support separate facilities and b) technology that could efficiently combine offline & online in one place.

In a rare alignment of the planets the facility where I worked and which had hired me to do offline editing, was given a contract to finish a television series for air. My employer felt that my efforts could be diverted to strictly online this series. But they didn’t count on the fact that the editor who was cutting it was as organized as kindergarten fire drill. So when his list called for tapes whose names were unclear everything bogged down. Unclear is too kind. A complete clusterf**k is a more apt description. (Hey, it’s not profanity. It’s a technical film and video term. Look it up.)

Duplicate tape numbers, inconsistent nomenclature, and mislabelling all combined with missing tapes (!) made for quite a puzzle. Sometimes I’d spend hours re-digitizing only to see that there were tapes that were wrong but because it had the same time code the result was very a dada-esque picture and sound edit. And because it was a series I couldn’t permanently unravel the tape naming with the editor because several episodes were already in the queue behind the one I was doing (renaming the tapes at that stage would only add fuel to the fire). It was a nightmare unmatchable by Freddie Krueger.

My favourite moment was when the system asked me to insert tape “386”. Nothing else- just “386”. There wasn’t anything even resembling a 386. Not a 385 or 387. The highest number was #24 out of 50 tapes (don’t ask). It was late and the editor was unavailable and I was just about to throw something heavy when my focus shifted I noticed one single gray tape amongst the few dozen black tapes. It happened to be Maxell stock whose only identifying label was the product number “386”. Grrrrrrrrrrr.

When I completed that nightmare days later I loaded the EDL for episode two and immediately found a sea of clips in the timeline all called “untitled” because he couldn’t be bothered to label them -- I cracked. I burst into the hall, grabbed my brand new assistant by the ear (figuratively), dragged him into the suite, pointed to each and everything this editor had done wrong and bellowed, “You see all this? You SEE it?!? If you EVER do anything like this…EVER… I will hunt you down and kill you. I don’t care if you’re not even working for me. You - dead. Painfully. Got it?”

He got it.

This week’s blog could rest on the importance of proper and consistent labeling or giving everything a clear title. All true. But I’m going to add to it a very helpful tip. Whenever you label a tape, graphic, audio file, or whatever you digitize or import give the first 10 characters or less the same unique name – a name only related to the specific project. For instance if you’re doing a documentary about roses you might label your first tape “Rose 001”. (Note the three digits in the tape number to allow for 999 possible tapes which will sort in proper numeric order). Audio mix or graphic files you’ve been handed might be labelled “June 18th mix” or “opening titles”. So add the name “Rose” to the front of it before you import it. Now, when you’re wrestling with hundreds of tapes and dozens of files, you’re safely organized.

But something else very helpful happens. Notice when you’re organizing media on your hard drives the first 10 characters of the MXF files relate to the tape name? If you call all your tapes “footage” or “tape” you’re begging for confusion later. But your unique ”Rose” tapes will stand out against your other project’s “Daisy” tape names, for example. Even if you do what our shop does - which is to barcode each and every tape (yes, we rock) - you should still put a project name in front. And this labelling ripples to the media file names which in turn will allow you to cull, move or delete media with the assurance that you’re playing with the right stuff.

After all, a rose, by some other name, would be hard to find.

Thursday, June 10, 2010

THE POWER OF JAVA

017 - I was at an industry award show and a client of ours grabbed me by the arm and dragged me over to the other side of the room. “Doug” she said to the other man, “This is Fish. Fish co-owns Filet Post production…. and they have THE BEST food”.

“Yes”, I said and added, “we are pretty good at that editing and animation stuff too”.

Sigh. It’s true, we do have the best food…for a post house. Why on earth should th
at be so? Well when I was an assistant I learned a valuable lesson that I repeat so often it should be on my business card: ‘”A good cup of coffee can make or break a screening”.

You see people, being people, come in from the cold or heat after a crappy day, morning or night and then plunk themselves down in your chair, bark “okay, play this thing” and glare at the screen looking for anything they can to blame for their crappy lives. The absolute worst thing you can do is let them watch anything you worked so hard on. You have to wind them down. Way down.

The story goes that the only thing that saved “Monty Python and the Holy Grail” was Graham Chapman’s announcement of “drinks are on me” during the first rushes screening. I believe it’s more important to feed the crew well than pay them well. At least on the day of the shoot.

A comfortable chair, polite conversation, a fridge full of an assorted drinks (including alcohol corporate if culture permits), a plate of snacks, and freshly brewed, organically grown, fair-trade coffee (with choice of milk, cream and soy): those are my minimums. It’s amazing what that kind of treatment can do to quell the storms the client has brought in with them. And here’s a tip. Never, ever ask them first. They’ll always be polite and say no. Have it ready. Even if they won’t drink it or eat it, they’ll always appreciate it. And let’s be honest, they can have a crappy day and it’s kind of nice to help them out of it.

I like to think about the time that 10 people came over to watch a video in the middle of preparing for a huge event of which our video work was a significant component. They arrived tired, angry and frustrated. But man did that sandwich tray and cold beer turn their frowns upside-down. Or there’s the time that a new client of mine ran back to her office shouting “Oh my God. I was just at Fish’s and he had candy!” It always helps restore a proper mood.

I have to be clear: it’s not a bribe. I don’t bribe. The work still has to be fabulous. No amount of French pastry will make up for sloppy product. But I can’t stand it when it’s unfairly judged and I’ll do everything in my power to ensure their attitude matches our work.

Since opening our company we’ve taken it one step further - any dubs that leave out place are accompanied by a small packet of candy. It’s astounding how people will fight over three cents worth of candy. And equally surprising how peeved they are if we forget to put one in the package!

That’s my blog for today. Now before you post a comment, would you like a cookie?

Friday, June 4, 2010

FORKS


016- Hey, it’s been a while but it's good to be back. In part I was gone because I’ve been busy. Actually, more accurately, I’ve been really busy. But I confess that a small part of me hasn’t been back for other more psychological reasons. You see I’ve received so many positive comments from people who enjoy reading the blogs but aren’t editors I was rather paralyzed as to how to get started. Do I rant about something more general that appeals to a broader group of people? Or do I provide insight about a tip or two relating specifically to the Media Composer and risk alienating a bunch of non-editing (a.k.a human) people right away?

Getting started is truly the hardest part of any exercise – including editing. Everything can seem so daunting. And the more you delay the bigger the mountain to climb. You can be frozen by the fear of choosing the wrong path. So I make it easier on myself right away by pre-determining multiple paths. I write down all the ideas of how to proceed. Today I have chosen to talk about, of all things, “choices” and to share a tip about, of all things, “preferences”. You see? Now I’ve started.

Choices:
There’s an old editor’s joke that asks “how many editors does it take to change a light bulb?” The answer, “I could change it but you won’t like it”. I guess we all suffer from it - the sureness that they are wrong and that you know better before even trying. Yet when I’m editing, the first cut I do is the one that is closest to the director’s, agency’s, client’s vision of where the story should go. No matter how much I think they are absolutely, 100% dead wrong (and my ego always thinks they are wrong if they don’t agree with me) I go with that path first. This is important for three reasons. (Memorize these and you’re career will go a lot smoother.)

Reason#1: they’re not always wrong. Admit it, it’s true. So many times I’ve finished with their path, look back and slapped my head, “ohhhh, that’s why they did it that way”. But I couldn’t see it until I tried. So do it their way first. Spend the energy. Do it right. Do it well. Get it done. You’ll be glad you did.

Reason#2: If you don’t try it their way and show them that it doesn’t work then they’ll never know whether they would have preferred it your way because they have nothing to compare it to. Trust me when I say they won’t trust you. Show them their way, then show them yours. They’ll always appreciate the effort and the decision for them (and you) is that much clearer.

Reason#3: People like choices. Not too many choices, mind you. But they like to choose from more than one. Bananas, cars, vacation destinations - people want options. Give them more than one choice and they’ll make a decision and feel comforted that they had a part in the process. Give them only one choice and they’ll find faults in the one being shown…forcing you to make changes just ‘because.” Don’t go there. It’s a dark, evil place that breeds bitterness and resentment. When I’m forced to go to the “make changes just because” place I spend my time in the basement thinking about my job while polishing my shotgun. Not good.

So, after I do the “wrong” version I go onto the “right” version, and then others as well. I personally believe I’m paid to explore and so I do…I explore a great deal. Then, when I feel I have done enough I am satisfied that I’ve contributed to the creative process and that I have made my mark and earned my keep.

Preferences:
This is one of the things I like best about the Avid. There is an incredible amount of control over your work environment. From A to Z - the Avid is loaded with choices via preferences. And I like having a lot of preferences to choose from.

People often forget about Site settings. Site settings is the often empty folder than pops up when you choose it from the “Special” pull-down menu in the Media Composer. And it is special. It’s special because a Site setting allows you to mark your favourite preference in such a way that it travels from project to project. In other words, whatever you put in there will be the dominant setting when you create a new project.

This is very helpful because many Avid settings either reset in new projects or simply carry over from the last project you use. For instance "Media creation” preferences often default to whatever Avid thinks is best. But you probably prefer something totally different. Another one is the timeline timecode start in the General preference pane (which for reasons mentioned in another blog I prefer to start as a Drop-frame 09;59;40;00 start point) .

Whatever you like, whichever settings you feel the need to always start up with, just drag your favourite preference from the project window into the Site settings window and voila! – your next new project will have that already in place.

See you next week. I mean it this time.

Thursday, May 6, 2010

REFRAIN


015- Way, way back I accepted a job offer to move to Nova Scotia. I came here as a very eager beaver. I worked on just about everything and anything. Unlike my career in Toronto as a strictly commercial editor I found myself working on all types of projects here. It didn’t matter what the projects were I dove right in and did my level best to make everything “sing”.


Within one month of arriving I was tasked to create a video which promoted an international software convention coming to town. It had to be uplifting, energetic, and “cool”. But it also needed local flavours. A track was selected for me by my client and it involved using a popular regional band. The track, I’ll never forget it, was called “Reel and Roll” and when I was done people loved that video. I mean they LOVED it. It made you want to clap along. It made you want to watch it again and again. It made you want to come to our province. In short, it did its job and did it very well. I was pleased, my client was pleased and their client was pleased. Next!


Well, next turned out to be a similar job. You know how it works: prove yourself on that one and get something just like it. Only they said “Hey! We love what you did with that video with the ‘Reel and Roll thingy'. Use that track again”. Huh? “Um, well…okay” I dutifully replied, against my better instincts, and proceeded to dive in and use the same track. I didn’t like the process so much this time. It was harder to work. I couldn’t get inspired. But worst of all when she came in to review she shrugged her shoulders in kind of a “you didn’t do as good a job this time” way. So I went back into the footage and polished it some more… and more… and more… until she begrudgingly took her tape away. (Tape, remember those?)


I knew right away what the problem was. She was expecting the same heart-pounding reaction she got before. And she wasn’t getting it because it wasn’t fresh. But that wasn’t all. I wasn’t getting freshly inspired to tackle the footage in a unique way. I didn’t have a fresh “muse” from which to draw on.


It got worse. For years, and I mean YEARS, people would come to me and say “We have a video and we want you to use that “Reel ad Roll” track. It haunted me. It got so bad I threatened my clients with bodily harm if they even so much as mentioned it. So much for the eager beaver.


The lessons I learned were hard but they instilled a pretty solid rule in my career that I rarely deviate from. I never use the same music track twice. No matter how much a track might be calling out to me I do not repeat. Like a siren in the water luring me to rocky shores I must resist the urge to follow their sweet call to certain disaster. With such easy access to the internet, stock music companies and composers there is a seemly infinite amount of music to choose from out there and there’s no reason to tap the same tree twice for sap.


I once heard a college professor say if he had any wish he would want to read Shakespeare’s Richard III for the first time. He wanted to experience the thrill and freshness of reading that play for the first time again. I get that. There are movies that I would love to have my memory erased just so I could feel the same way when I saw them again. Like drug addicts we want that same high again and go running back to the same place only to find it doesn’t have the same 'hit'.


The result of this pledge is not only unique project every time, but a unique collection of work in my reel and in my life. Clients can review anything -anything - I’ve done and always feel I’ve got a fresh approach. Because I do. And I’m happier for it.


And if they mention using “Reel and Roll” I hit them in the face with a shovel. If they keep insisting, then, and only then, I repeat. I may never use the same music twice but the dull thud of a shovel in the face never fails to get the point across.

Wednesday, April 21, 2010

CHANGE THE BATTERIES

014- And now…my plan for world peace. Hear me out: I’m serious.

We can solve all the issues that cause friction between people if we all lobby the United Nations to ratify an agreement that obliges every person in the world to have to enlist in service for no fewer than three consecutive years. Generally, this would apply to every teenage boy or girl and would start sometime shortly after his or her eighteenth birthday. But the service I speak of is not the military. It’s retail. We should require, demand - coerce if necessary -every single youth to endure the agonizing, frustrating and infuriating ordeal of interacting with the general public. They can work behind a counter or over a phone line but they must be forced to deal with…well… people.

My early experience in retail impressed upon me the fact that 99% of the world is functionally brain-dead (a favourite expression of my father). They are stubborn, rude, and ignorant. And yet - tragically - equipped with their own credit card. And for six years of my life I had to sell them VCRs, televisions and film cameras. Needless to say I hated the entire experience. Lots of people who did not know what they were talking about would berate me about the products they bought. They never read the manual but blamed me for issues they frequently brought upon themselves. By a mysterious coincidence of numbers I found that 99% of the problems could be solved with one simple action. I’ll give you a hint: it’s in the title of this blog.

But the only thing scarier than realizing that 99% of the world was brain-dead was the thought that I, myself, might be one of them. And so I tread lightly and patiently. I actually think my experience in retail makes me a better person and, more importantly, a better customer. If we all went through that we might be just a little bit nicer to our fellow human beings.

Now recently I did something I do about once a year: I called tech-support. Yup, I called Avid and asked a question that, quite frankly, wasn’t super-critical to my day-to-day editing but was instead something rather small, random and intermittent (a tough thing to diagnose). I won’t bore you with the details but suffice it to say the question boiled down to “why is this doing this?”Not surprisingly, because it was not easily reproducible and didn’t appear on the help sites on-line they didn’t have a solution. But they did pull out their patented suggestion: “Have you tried recreating your user settings?” (You may be interested to know that this suggestion, the first one to leave the lips from anyone at tech support, replaced a decade long standard question from Avid tech: “Is Appletalk turned on?”. For the record, my problems were never related *$#%ing Appletalk.)

Back to my user settings. Replacing one’s user settings is no small task. The Media Composer, god-bless-it, is loaded with settings, buttons, palettes, and options hidden in all sorts of places. Asking to throw them out and try a new set (in this case, try it for a while to see if the problem returns) was rather irritating. It was not an easy hike. It was not as simple as changing the batteries. So I ignored their “stupid” advice and went back to work.

About a month later, having put up with this annoyance long enough, I decided to give Avid’s suggestion a whirl. But I tried to be smart about it and used a simple Mac solution. I used COMMAND-SHIFT-4! Translated this means I took select screen captures of areas around the Avid. I captured my timeline buttons, my composer window buttons, my general user settings, my keyboard map, and my fast-menu palette. Then, when I threw out my user settings forcing the Avid to start fresh I was able to refer to these clips. I could see what I had where and what settings I had carefully worked out over the years so I wouldn’t have to guess how I had them before. (In the Windows world there are free applications that will allow you to do the same thing. The names escape me now but it’s worth finding one for this exercise alone.)

After this two funny things happened: first was how much more I discovered about the Avid’s settings that had changed that I didn’t even notice had changed because I hadn’t created new settings in so long. I can import more than 60 frames of a still now? When did that happen? Oh, look! We can edit 3D content. Cool.
Another thing was how many other little annoyances weren’t there anymore. Lots of bugs simply went away. And the system was much snappier in performance. For example, slow audio scrubbing, which I had mistakenly attributed software issues, was gone and worked much more fluidly. Or an issue where the colour correction palette would span my two monitors awkwardly every time I opened it was no longer doing that. Awesome.

So it turned out I was being the stubborn idiot I swore not to be. But at least I wasn’t as dumb as the guy who brought in his exposed film in a clear ziplock bag to get developed. “But I took it out in a darkroom” he sputtered angrily. My manager look through the clear bag toward the customer’s angry eyes “Can you SEE me?” the manager asked sarcastically.

Wow, that customer was a ….customer.

Thursday, April 15, 2010

SHE COMES IN COLOURS

013- (It figures my thirteenth blog would be my first late one. Apologies to anyone keeping score. Kudos to whomever won the pool.)

Let’s raise a cheer for the glorious montage! Film’s answer to the collage. The editor’s answer when lacking a story. A client’s answer to shoving in as much as they can in a tiny space with reckless regard to taste, pace or style. Montages: God, I hate ‘em.

But that’s not to say I’m not good at them. I am. Or at least I must be given the number of times people ask me to do them. “Y’know what we’d like, Fish? A montage. You should do one of ‘your’ montages”.

Sigh. They’re not mine. I didn’t invent the blasted thing. If I did I would have killed myself by now from the shame.

In my world, the commercial & corporate world, a montage solves a very important problem. How do you get warring & squabbling divisions, groups, parties, organizations to all agree on what should go into a video or commercial? Well, you do it with a montage, that’s how! I’ll give you an example.

I have a client that has four major divisions to its organization. They frequently come together to do a video or a commercial promoting all four pieces. Now I don’t envy the agencies set to this task. It’s like herding cats. Just getting them to agree on a logo design is daunting enough. Then four collections of footage are dumped at my doorstep. Each division wants to be fairly and evenly represented. (Actually, that’s giving them too much credit. Each wants to be represented MORE than the other. But I digress.)

I do NOT edit mathematically - but montages are the closest I ever come to it. “So here’s a shot from your group, and shot from yours, and then a shot from yours and… then yours…and back we go again.” It’s not that simple, of course. I’m still motivated my music and pace. Visually I may be compelled to put a few shots back to back from the same place to better tell a visual story (for lack of a better expression). But I’d better make up for that hoarding by ignoring that division for the next few shots. Crazy? Yup. But I manage to make something people like and keep the peace between them. Then, at the end of the day, I reach for a nice bottle of wine to drown the memory.

But how do I keep track of all that stuff? Well, the Avid Media Composer makes it easy. I colour code my clips (colour with a ‘u’, since I’m living and working here in Canada). Colour coding material according to each region allows me to instantly see in my timeline what came from where and how often. It makes the delicate balance of montages a sane and swift exercise.

If you’ve read my blogs you know that I’m far too anal retentive to stop there. Let’s channel Harry Chapin for a moment: “There are so many colors in the raaa -ain-bow, and I use every one”. So true, Harry.

No matter what the project, I consistently colour my music clips blue, my sound effects orange and my voice-overs yellow. If I need to differentiate indoors from outdoor, types of camera formats, locations or subjects I burn through my digital crayons before I’ve cut a single frame. It takes a small investment of time up front but man does it keep my head screwed on tight later. When 8 tracks of audio and 6 tracks of complex video span twenty-two minutes of content knowing what’s what makes for fast and confident modifications to my cut.

If you’ve edited for any amount of time in a non-linear fashion, you’ve probably been aware that with a timeline you gain a geographic memory where you can actually look at an area and know what a clip is without having to listen or watch it. And labeling clips with colours makes that even easier.

Lest we forget the bright fire engine red clips that scream “MEDIA OFFLINE”. Or the urine-yellow clips warning of mixed media resolutions. Even the slight shade differences between video and audio tracks make for subtle hints as to what you are moving where. Now leap across to your other monitor where you can label the background of bins so you can easily isolate your cuts bin from a footage bin with a glance rather than searching for names.

In the end, one might describe my project space as rather “like a rainbow”.

Wednesday, April 7, 2010

TOOL BELT


012- I envy women. Besides the natural, glorious gifts bestowed upon them by God that I do so appreciate, they get to wear purses without public ridicule. Oh I’ve tried the side-saddles, tote-bags and satchels. But I’m afraid they just don’t suit me. I look as odd as a shoe salesman in a kimono. “Hey old man, who you tryin’ to kid?” I can hear people think. And while very, very comfortable with my sexuality, I’m not brave enough to have a devil-may care attitude about a full-blown “screw you and your opinions about me” purse.

And yet I carry around so much “stuff” everywhere I go. My iPhone - which until last fall was functionally divided between a cell phone and an iPod touch. My keys for a multitude of destinations – home, office, parents, gate, security lockers, etc.. And an overstuffed wallet - filled with receipts, credit cards, business cards (for myself and my business partner), and a lottery ticket (my only business exit strategy). All that and spare change too.

In the winter I carry around a jacket filled with these items and more. When others pick it up they inevitably say, “Whoa! That’s coat is so freak’n heavy”. And it is, very heavy. In the summer? I pound items into my pockets. This only results in creating tumour-like appendages on my already well-defined pear physique. I tried shedding clothing to make up for the weight difference but I lost a lot of clients that way. A lot of staff too.

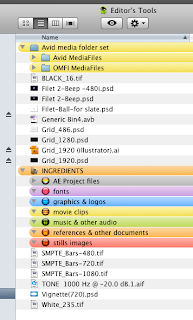
However, in my digital world I carry a purse without a second thought and it suits me fine. It’s my “editor’s toolbox” folder and I stuff in it all those things that I use all the time so I know where to find them.

What do I put in there? Way more than I can fit in any purse, I assure you.

• a tiff file of “black” at 16 RGB (see Blog #007)
• a tiff file of “white” at 235 RGB if I want a quick & sloppy flash frame
• premade Photoshop template files with safe-title grids and layers of premade black and white solids; all in three sizes: 486, 720 and 1080 – handy for laying up titles and still imagery to the correct aspect ratio
• same as above but with Adobe Illustrator files – all ready-made
• SMPTE bars in three sizes: 486, 720 and 1080
• a two beep of my company logo
• an alpha channel of my company logo ready for slating my masters
• reference tone at -20dB
• a set of empty folders with the same nomenclature and structure as Avid media files so I can drop one into a drive and slide media into them with ease
• a Photoshop file with dozens of layers containing custom made vignettes I use to spice up some visuals and quickly mask off areas in the footage
• and, of course, my “Ingredients” empty sub-folder set (see Blog #001).

Now it’s true that I could make my own black, white or tone in the Avid. There are templates in Photoshop & Illustrator already made. But I find having frequently used files and media right there to drag, drop or ‘click open’ saves me a lot of unnecessary tedium and makes the creative process flow a lot more smoothly.

Also, so does wearing a thong. That does wonders for the imagination.

Editors note: I read and appreciate all your feedback I’ve been getting. Nice to know I’m not just amusing myself. Keep it coming! And I very much want to know what’s in your “purse”, if you have one. Thank you all.

Wednesday, March 31, 2010

SETTING THE RIGHT TONE


011- I read somewhere that people who write blogs pontificate about things they know very little about. I know very little about sound. Here’s my blog.

When I was a baby my mother and father lived in a small apartment that lived right behind the Chicago stockyards. Every night these trains would get slammed together and roll out before dawn. Y’know the song? “Ridin’ on the City of New Orleans…Illinois central Monday morning rail…”. Yup, those stock yards. Huge areas devoted to managing freight trains. We’re talking a lot of noise. Constant noise. And I slept through it all. Dad always said that’s why today I could sleep through anything.


I like to talk a lot about audio to anyone within earshot (get it? – A pun!) . For me, and I know I’ve said this already, editing picture is 50% about sound. Which is odd given our need for equipment that frequently goes “whirrrrrrr”. Or perhaps you didn’t notice.


You didn’t notice, or rather you STOPPED noticing, because your brain has a great way of tuning that crap out. If it didn’t people could never live in modern cities. Florescent buzz, exhaust fans, car engines, planes, trains, you-name-it constantly surrounds us. The brain makes it all go away so you can concentrate, focus if you will, on what’s important.


Back to picture for a moment. You know how your eyes compensate for different temperatures of light but cameras can’t do this so well -- so sometimes to get a bad colour cast to footage because the colour balance was set incorrectly? Well, location sound recordings are the same way. They do a very bad job of filtering noise. In fact they usually try hard to accentuate it.


That’s why sound mixers frequently work so hard to get rid of all that noise. They have filters and compressors and all sorts of newfangled plug-ins designed to clean all that up. And a lot of the time it is a good idea, especially if the voices you’re trying to hear are unintelligible due to noise.


But sometimes they do all that filtering and it turns out sounding bad. You see many sound mixers, even “the best” ones, feel that the best possible world is a soundscape which is pristine. Where voices emanate from a noiseless atmosphere. And, frankly, it just never sounds right.


Whenever I want to do any kind of ADR (additional dialogue recording) to replace an actor in a scene I usually drag them outside, not in a studio. Why? Well because the world we live in isn’t perfect. And the way a voice interacts with that world has a particular sound signature that makes it sound real. Outside is dramatically different from inside. When ADR work is done in studio it sounds…well… wrong. The sound gets too clean. Nature isn’t like that. And adding any reverb or sound in later isn’t the same as the subtle pattern a voice makes when it bounces around and back to the microphone on location.


What does this have to do with editing (like a Fish)? Just this week I was working on a dialogue cut where the person speaking on camera was in a store which had beer fridges. Those fridges were doing their level best to be heard on camera. Now normally you send that off to a sound mixer and their first instinct is to clamp that noise down. But that noise sneaks in and around the voices when the clamp isn’t quite there. The result is an awkward NOISE-no noise-NOISE factor that brutally cuts in and out every single time the person utters a bit of sound. It’s very disconcerting to the ear…and to the brain.


Imagine that whir from your gear around you (the fans) turned on and off and on and off in random intervals. It would drive your crazy. Thus why clamping doesn’t work in a mix. Bad, bad, bad.


So my tip for you this week is to add noise between your dialogue edits. That’s right - add it. Each time you edit a bit of dialogue don’t leave the track bare. Instead fill it with the blank noise that was around the person at the time. For those who don’t know this it is called “room tone”. A good location sound recordist will provide this room tone for you in a separate clip. But often I find it necessary to try and find some sound very close to the time the person was speaking. This is because of subtle variations in sound that occur as time passes on any location.


The result is it smoothes out everything. And when you play it back the brain does its usual job of filtering it out for you. You don’t hear the noise because it’s always there and as a result the mix sounds not only better but also more natural.


Sound mixers have debated me on this use of room tone and the ADR recording techniques I do. Many tell me I’m wrong. I grant you that they are the experts. But to paraphrase a familiar expression about art: I may not know sound but I know what I like.

(Happy Easter)

Wednesday, March 24, 2010

TRUST YOUR EYES


010- Blog number ten already. Wow, time flies. Speaking of time I thought I’d share something special today in celebration of this decablog. I’m going to reveal to you two secrets. One is about me personally and the other is about me professionally.

Personally you should know that I am in fact a very, very lazy person. I will try and find whatever shortcut I can to save time. I scour the earth for tips and tricks about every application I use and every piece of hardware I own. I like to save time wherever I can. I’ll cut corners on corners (without sacrificing quality mind you) just to save milliseconds. I’m trying to get some time back into my own hands so I can watch “Lost” or “Jon Stewart” in peace and then go to bed. Ahhh, bed. Is there anything better than bed? Bed is awesome.

Professionally I have one trick up my sleeve that saves me more time than anything else. This is THE trick that guarantees me the smoothest possible post process. It is THE trick that applies to any edit platform; Avid, FCP, Steenbeck, Movieola, whatever. This is THE trick that gets me to a successful cut that everyone is happy with (especially me) and gets me there fast. This is THE trick to remember if you’d don’t remember anything else. This technique governs everything I do in an edit suite and I never, ever skip it nor try and find a faster way around it. It is my first commandment.

What is this glorious bit of insight that I feel you cannot do without? It boils down to two simple words.

Watch everything.

That’s right. Whatever footage you get no matter how much it is, watch everything. No matter how much the producers and director’s are ordering you what takes to use. No matter how much the stuff sucks. No matter how much a chunk of footage is “obviously” a waste of time. No matter how much time constraint you’re under, stay up, drink lots of coffee and watch everything.

Why? Well, because it’s your job. But there are a multitude of sub-reasons so I’ll name my top three.

1) you probably weren’t there when it was shot so you have the unique perspective of knowing what you have to work with and not being biased by anything that happened on set. People come in with these dumb-ass biases in the edit suite like “I don’t like her -- she was bad actress” or “we rented a thousand-dollar an hour crane to get that shot so make sure you use it”. Walter Murch calls it “seeing outside of the frame”. The actress may seem perfectly fine to you and the crane shot irrelevant. So watch everything and see things other people have dismissed. Part of your job is to know what you know by way of the footage and nothing more - because that’s all the viewer will know too.

2) watching everything allows you to see beyond the script as well. Sure the director intended the scenes to go A, B, C. And maybe you have to do it that way to show him or her what they intended. But as lazy as I am “Command-D” is a fast way to duplicate an idea and mix it up a bit to try something new. Another part of your job is to find the gem or the alternate paths not ever considered. It is not to take orders, but to collaborate. You can’t do that by being blind to some of the footage. There isn’t a project, program, film or commercial that I have worked on that wasn’t somehow affected positively by something that was supposed to hit the cutting room floor. So watch everything and be a better editor for it.

3) the biggest reason to watch everything is to fix problems. Whenever anything comes up in post, any obstacle, you have to be the authority of what is possible and what is not within the confines of the footage. The footage is now locked in your brain; make sure it’s all there. Trust me, you can fix just about anything if you can see all the pieces on the editorial chess board. That is part of your job too. And your reward is the trust of your team.

However, if something isn’t working, if the cut isn’t good, if you doubt the path you’re on and you don’t know what to do it inevitably comes down to the fact you didn’t watch absolutely everything. If you don’t you’ll find yourself constantly going back into the footage again and again to see what you missed. Watch everything, do that first and save an incredible amount of time in the long-run.

Now, I’d tell you some other reasons but I’m tired and there’s a new episode of “Lost” I wanna see.

Wednesday, March 17, 2010

MANNERS

009- What I was taught at a very, very young age still gets me compliments today. If I was a guest at someone’s home for dinner, say going over to my friend Goran’s house, when I was finished my meal I was taught to always take my dishes to the sink or dishwasher. Result? Goran’s mom thought I was a “good boy” and smiled a smile that made Goran want to retch. Thus I made sure to do it all the time. But I didn’t mind and quite frankly, it gets a gravy-smeared plate out of my face. So it helps everyone.


That brings me to how I handle my OMF and AAF files. If you don’t know what they are, they are…well…brilliant. An OMF allows you to send along audio or video files in a multiple layered format that matches your timeline. And each clip in your timeline within this export will have handles.


Why is this so important? Well, for audio it means that the audio mixer doesn’t have to spend time capturing each track separately and trying to figure out where clips begin & end. It saves having to do timeline charts that graphically show them where clips will appear. These two things mean it will save a lot of supervision on my part. Plus if the mixer needs just a bit more of a sound because I cut it too tight, they have those handles there that give them immense flexibility.


For video you can hand over well-organized uncompressed files for an online/conform or, in our case here at our shop, for colour correction. Each clip within the OMF/AAF is automatically broken into separate layers and our colourist doesn’t have to find edit points to notch her shots.


If you’re used to this always being there well you haven’t lived through the era of multiple edited rolls of 35mm audio magnetic stock painstakingly laid up in giant fully locked playback machine rooms that flowed through a mixing console. It also means you avoided having to do carefully charted and colour-coded timelines on long reams of paper. You are lucky indeed.


When Avid demoed OMFs at a 1994 Avid conference in Florida I attended I knew immediately that this was big. And as the years passed I was thrilled to see so many manufacturers adopt the standard. Saves so much time.


That’s assuming you do it right. You see, as the Media Composer got more and more complicated the OMF/AAF exports got more & more complicated. But in a lot of cases the hardware or software these files got shuttled to didn’t know how to handle these embellished files. Any dissolve effects in the audio? It would create separate dissolve files on lower tracks. Add an EQ or Audio suite plug in to a track? It is a guarantee the file gets all messed up. Use Fluidmotion to slow picture down or apply a Boris filter effect? That OMF/AAF file practically melts on the hard drive. The result is confusion for the application trying to import it and frustration for the professionals needing to use it. Best case scenario - errors on import. Worst case - complete failure to import.


So when I prep my files I create separate unique timelines for the exports. If it is for an audio mixer, for example, I only hand them a timeline with audio in it. Sounds obvious? Amazing how many editors export OMF/AAF files with both picture and audio to go to mix houses. Audio professionals scratch their heads and wonder why a 30second commercial has 5 gigs of audio attached!


But that’s not all. Any cross dissolves I do with an effect - I clean them off the timeline. In fact any effects at all are cleaned off. In video exports I take the time to mix down motion effects more complicated than an “interpolated” render. I make sure the export is only relevant picture- no titles or imported graphics, etc. {But I have found I can leave most resizing effects.} I always ensure my dialogue tracks are separate from sound effects and they, in turn, are separate from music. No jumbling them together. I replicate cross fades by using rubber-banding on multiple tracks.


Most importantly I consolidate the media being exported so the handles aren’t unnecessarily miles long with drive-choking file sizes.


Then I write a short note to the receiver about what they can expect and where to expect it. Plus I include any other notes that could help them like file type, frequency, how big the handles are, etc. and I note any strangeness like deliberate holes in the timeline that may make someone scratch their head.


I’ll do anything I can to make sure their process goes very smoothly so I don’t get dozens of emails and phone calls. But more than avoiding phone calls it is just plain polite, courteous & respectful. The result is that I have people tell me all the time how easy it was to use my files and that they never had an easy time with anyone else’s files. It always makes me feel good.


Okay, so now that I cleaned my plate…when’s dessert?

Wednesday, March 10, 2010

SNAP CRACKLE POP

008- I do a fair bit of dialogue editing for my cuts. And I usually take comfort that there are scores of professionals who take over when I’m done to properly clean up and sweeten the edits I put together in a mix session. But that doesn’t give me license to ignore the effect of a bad audio mix on my clients and even myself. Sound, to my way of thinking as a picture editor, is 50% of the experience. That’s right, 50%. So I spend a fair bit of time cleaning up audio while I am cutting.

“Why bother?” you ask. Well I have learned the hard way that I can’t assume that anyone who is watching my cut understands what is supposed to happen. I’ve had clients get confused about why the music is so loud, why the train sound wasn’t there, why a voice over wasn’t the right performer, etc.

All of that interferes with their ability to get lost in the cut. Or to use my favourite term: “The suspension of disbelief”. That is to say, when someone forgets who and where they are and immerses themselves into your story -it truly a magical phenomenon of the human species to do this. I look at watching movies as legal drug use and just as addictive. Getting them there (and you as well) is the best way of ensuring that they and you are judging your project fairly without distraction. (Hey buddy, turn off that cell phone while you’re at it!)

One of my regular habits is teeny, tiny 2 frame cross fades between dialogue edits. The Avid edits at 1/30th of a second increments (or 1/24, or 1/25 depending on what you are formatting) and because of this it is sometimes impossible to get around a dialogue edit without creating an audible click or pop. Let me rephrase, it WILL pop and often.

The effect of this clicking and popping is like someone sitting behind you while you are watching a film and constantly flicking your earlobe with their fingers. I find it hugely distracting and often annoying. But maybe you don’t.

Or maybe you do. Notice at top I said I have to clean up audio “while I am cutting”? Sometimes a dialogue edit that matches a picture edit point pops just a bit and makes it seem like the picture edit is too harsh or misplaced. Try a 2 frame cross fade. Magically the picture edit seems much better.

Still not working? Try the cross fade AND slide your picture edit point ahead of back by one second so the edit point isn’t in line with sound edit point. Blasphemous, I know, to change picture to favour sound. But I’ll bet that it is way better. And even if you don’t like the picture edit it should at least tell you if it is truly bad timing or awkward sound pops that are getting in your way.


The Avid makes the process of applying hundreds of these dead simple:
1) mark and in and out and select only your dialogue tracks.
2) make sure your timeline marker is over an edit point
3) add a 2 frame dissolve…but when the dialogue box appears choose two frames and apply from in to out and also choose to skip existing effects (so it doesn’t destroy previous work).
4) You probably don’t need to render them

But if you truly miss the pops, try breaking bubble wrap...it is much more fun.

Wednesday, March 3, 2010

BASIC BLACK


007- Over six million years ago, in a land before time, I was in high school. (And yes - I did graduate). I learned then and still know now the importance of good presentation. A slick cover and clean pages meant a better grade on my papers. Good foam core backers with clean titles meant a better score on my science fair project. “Presentation is paramount” is a mantra I created I repeat to anyone who will listen. Not a guarantee of a good grade, mind you, but it doesn’t hurt.


So when it comes to screening a cut, any cut, I’m amazed how often editors ignore the fundamentals of good presentation. And that can be as simple as a black screen. A black screen is a clean slate to the eye and a definitive “period” to the end of a cut. Yet editors and assistants of all walks fail to screen their work with black at the start and at the tail of a sequence. The result is an awkward freeze frame at the start and stop which only serves to jar the viewer and ruin the emotion you carefully sewed together.


Or perhaps, one might assume, every cut of any kind should fade up and fade down at either end? WRONG, I say to thee. WRONG! Sometimes a sharp cut in and out is just what this type of edit requires emotionally. And while you might argue that black isn’t or shouldn’t be a steadfast rule I would say that it IS a commonly shared experience …like a blink (thank you Walter Murch) and therefore a familiar place in the mind.


Now the Avid isn’t very black friendly. A timeline in the Avid is a limbo-like area of nothingness until you add something to it and a Media Composer doesn’t allow filler to be that something. And after the last something the timeline ends abruptly. You won’t hear me say too many good things about Media 100 systems, but their infinite & multiple timelines are something Avid should have stolen long ago


To get black at the start of a timeline you have to choose “add filler at start” under the Clip menu. I actually have this key-mapped to F13 (with a preference setting of 10 seconds) so I can hit it multiple times.


For the end I import a black clip (black with RGB values at 16 so the black levels don’t shift) and lay that in way down the line in my timeline. Now when I hit play I can get a definitive start and definitive end to my sequence. The viewer’s brain registers this subconsciously. It just “feels” better. And it makes it easier when posting videos online as well because my timeline marks will include a bit of this black area on export.


“But wait!” I hear you cry, “Doesn’t that mess with your duration count?”. Well…yes…but I always use an automatic workaround. You see, my sequences start at 09;59;40;00 and I always have 20 seconds of black before the start so the cut begins at 10 hour mark exactly. Now my sequence time code register tells me how long I am.


Now don’t ask me about the importance of good spelling on those high school papers. That’s a lesson I keep relearning with the title tool every day.

Wednesday, February 24, 2010

NESTING, PRECOMPS, SMART OBJECTS & OTHER SYNONYMS


006- Back when Avid was just an Avid editing tool the first software version I used was 4.5. I know what you’re saying -- there is no 4.5. (not yet, anyway) Well, I’m talking about way back in 1993. I was handed my first Avid suite. It wasn’t wired up, it didn’t have any manuals and I had no tech support. Best of all I had a week to learn it and teach it to my senior editor because I was going on a honeymoon. You see we would be parted as editor and assistant for the first time in three years thus forcing him to work with one of those trendy “computer” things without my help.

Anyway…the thing about 4.5 is that it had no layers. Think about that. Avid software as an A/B roll edit suite. Yuck. You had a title tool and that’s it for your graphics ability. Still, it totally blew the doors off of tape-based editing.

Then along came 5.0. It had 24 amazing layers and 23 layers of potential deeply “nested” layers inside those layers. For some reason I understood how layers and nesting worked right away and why it was so cool. It was why I slid so well into After Effects too. Precomps acted very much the same way. The ability to wrap a bunch of media into a sub-package and then affect that wrapped item as a whole was very powerful.

Flash forward to today. Photoshop is my right arm. I constantly reach for it. I love/prefer designing my type in is PS because of the incredible flexibility and non-destructive treatments to type that you can do.

When I first started importing Photoshop layers into an Avid bin, I was blown away by how simple it was to layup a bunch of type and then for the Avid to recognize those layers independently; all while keeping the naming and file order. Awesome.

Then, as Photoshop has a tendency to do, the layers got a lot more complicated with non-destructive shadow, beveling, gradients, etc. Avid couldn’t keep up (I don’t blame the fine programmers at Avid). So I resorted to creating flattened versions of layers in the same file. I’d label them “flat” so I knew which ones to import.

Problem is if I wanted to make a small change it was a big pain in the ass to modify it and replace the flattened layer or keep track of multiple flattened versions. Files got bloated and things bogged down.

Then, like a big slap in the head I realized I should be using “Smart Objects”! Smart Objects are to Photoshop what nesting is to an Avid timeline. By creating my type layer, styling it and collapsing it into a smart object (like nesting in the Avid or precomping in After Effects) I could import that layer into the Avid and all the Media Composer would see is a flattened file with the effects intact. But (!) I could go back into the PSD file and by simply double clicking I could get all my non-destructive style parameters back, adjust something, close the smart object file, save the main file and batch import the same file name…which replaced it in the sequence – bam! It sounds slow but it is waaaayyy faster.

Okay, let’s chat next week about a few things I’d like to see in my anniversary edition of Media Composer 4.5.